
Need to set up your integration for Dynamics 365 with Constant Contact bidirectionally using SyncApps?
This article is one of the most used use-cases by our subscribers today where they will sync their Dynamics 365 Marketing Lists to Constant Contact Lists to send specific Constant Contact Campaigns and sync the Campaign Responses back to Dynamics 365.
Sign up here for the Free Trial and check this article out on how to set up the integration. Let's get started!
In your Dynamics 365, be sure that you have existing Marketing Lists and do have Contacts/Leads with an email address in them so that we can sync those over to Constant Contact. If you have existing Marketing Lists, you can also use those ones.
How to set the integration up?
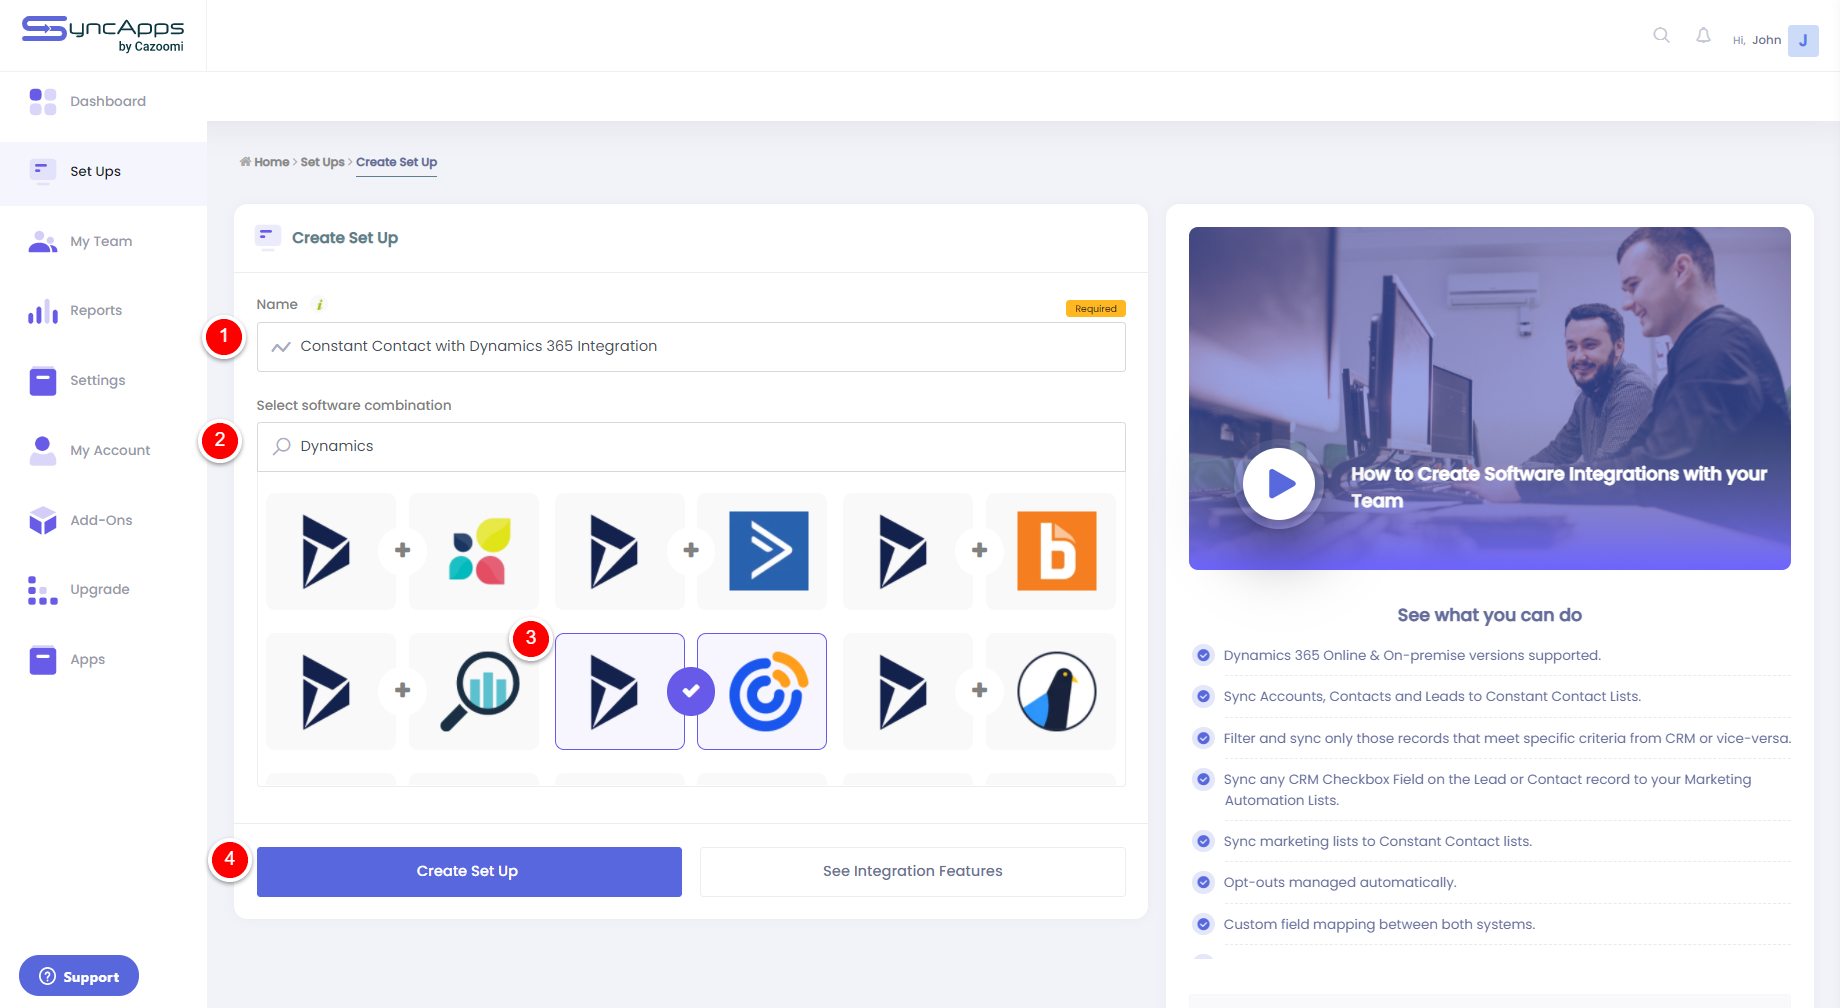
1.) Log in to your SyncApps account and tap the "Create new integration" button or you can go directly to the "Set Ups" tab located on the upper left-hand panel of the screen.
Name the "Set Up" integration based on your preference, type in "Dynamics" and look for Dynamics + Constant Contact option. Tap the "Create Setup".
2.) Enter your Dynamics 365 credentials and select the Entity type that you'll be syncing over to Constant Contact:
3.) Under the "Marketing List Sync" option, select the "Specify List(s) to Sync" and tap the "Select Specific Marketing List(s) To Sync", select the List(s) then tap "Update".
4.) Enable the "Want to integrate Marketing Metrics from your Constant Contact Campaigns such as Opens, Clicks, and Bounces back to Dynamics 365? Select this feature". This feature will then allow you to sync back the Constant Contact Campaign Responses such as opens, click, and bounces back to your Dynamics 365. For more information, please see the article here as you will need to set up the Campaign Response layout in your Dynamics 365:

Tap the "Next Step" button to proceed to Step 2 of the integration Set Up.
5.) In Step 2 of the integration Set Up, select "Version 3" API version then tap connect. Next, Enter the Main List that you'll be using for the integration. You can specify a new list name as we will then create that as an email list in Constant Contact that serves as the Main List for this integration or you can use an existing list in Constant Contact. Just make sure that the spelling and characters are exactly the same.
What is the Main List, and why do we need to define it in Step 2?
During the sync process, a new list with the specified name will be created in Constant Contact if you name a new one. Yet, you can still use the names of your existing lists in Constant Contact, just make sure that it should be verbatim.
When adding new subscribers to any Constant Contact List, please note that only those in your "Main List" will be synced, or selected from the following options; (Sync all active Contacts not just those in the specified Constant Contact List), to sync the specific Constant Contact subscribers to Dynamics 365.
6.) Complete the setup by tapping the Next Step buttons up until you reach Step 6 of the Integration Set Up, set the Sync Interval then tap the finish button and run the very first sync:
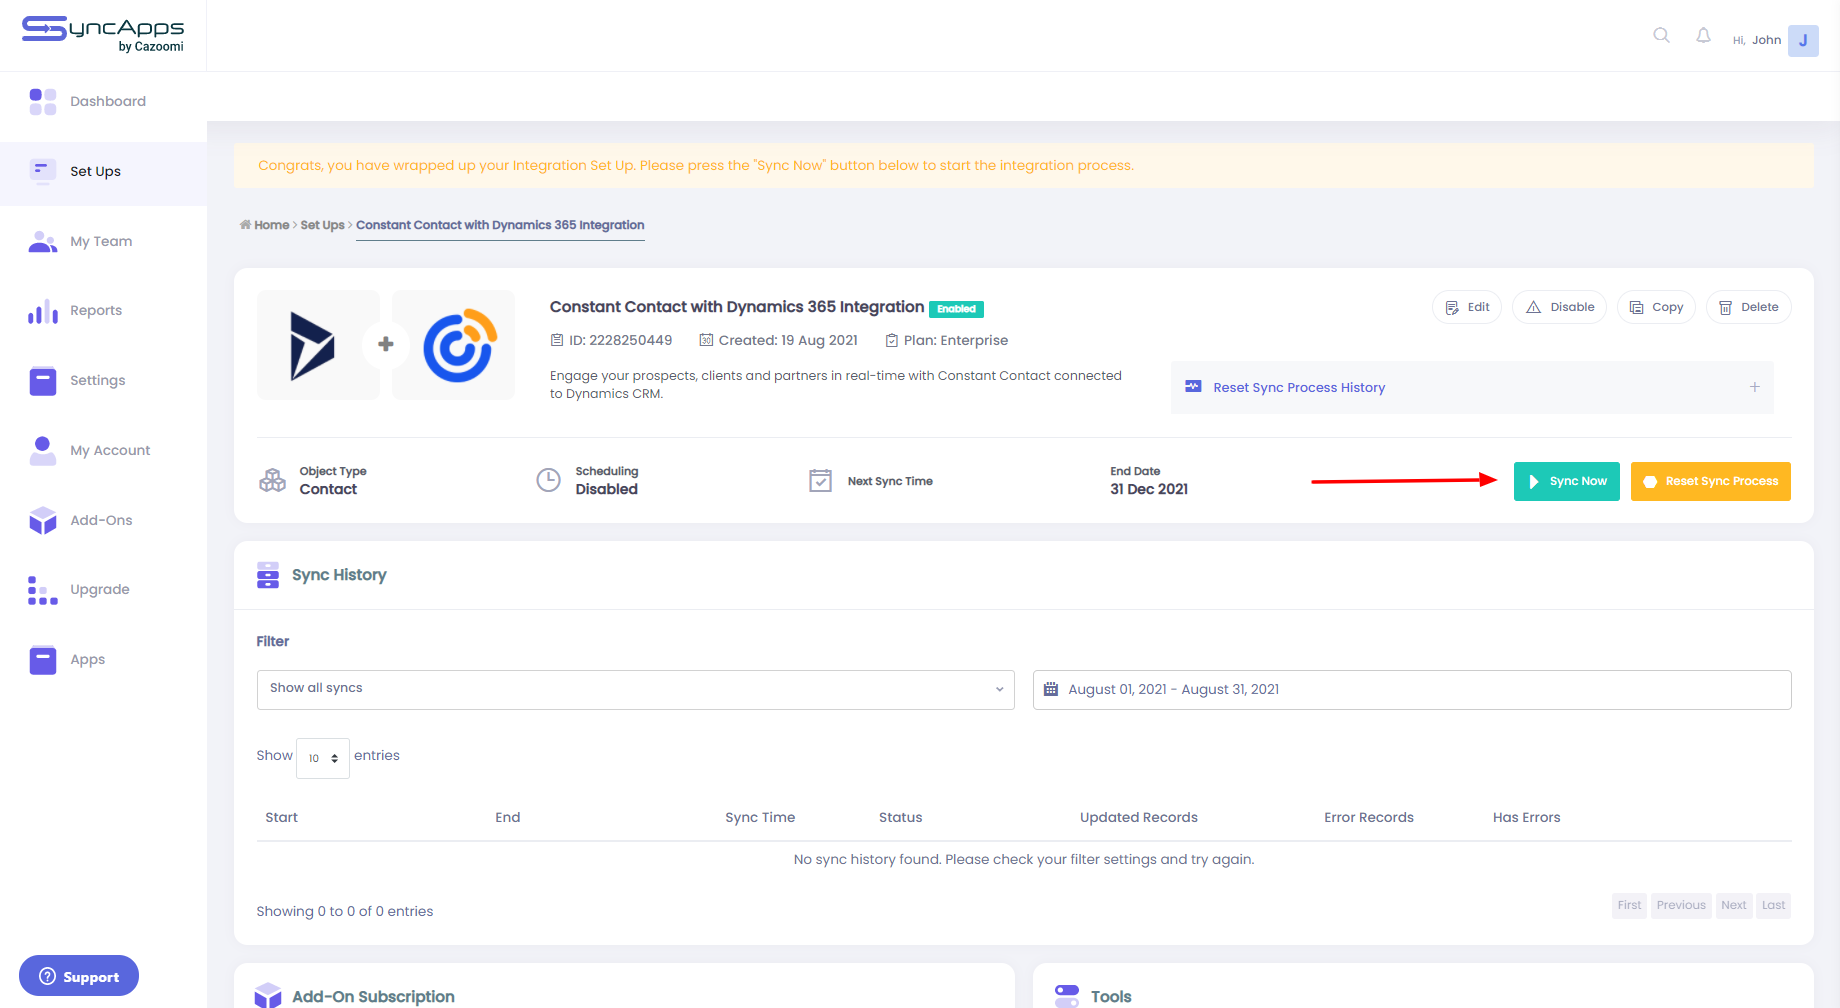
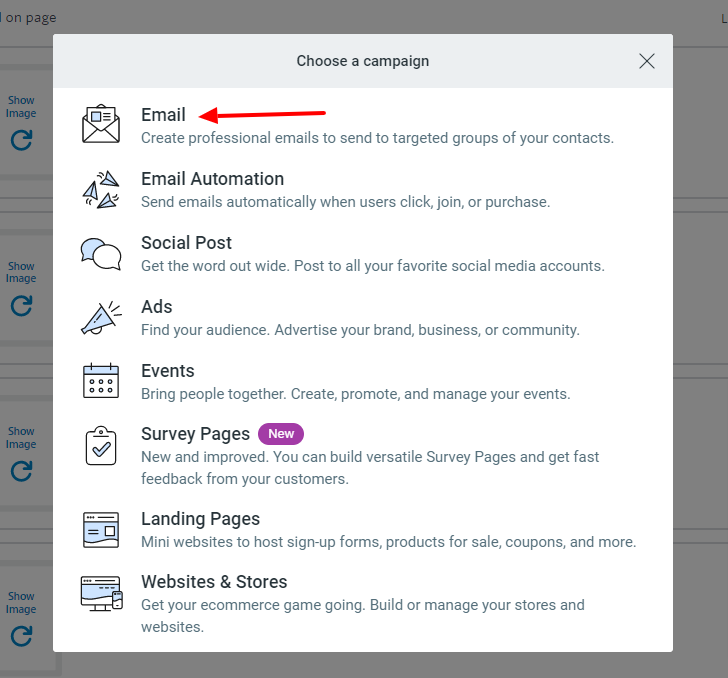
7.) Once the sync is completed, send a Campaign to that Constant Contact List that was created by SyncApps from that selected Marketing List(s) and wait for the scheduled sync to run or you can force run the sync by tapping the "Sync Now" button.
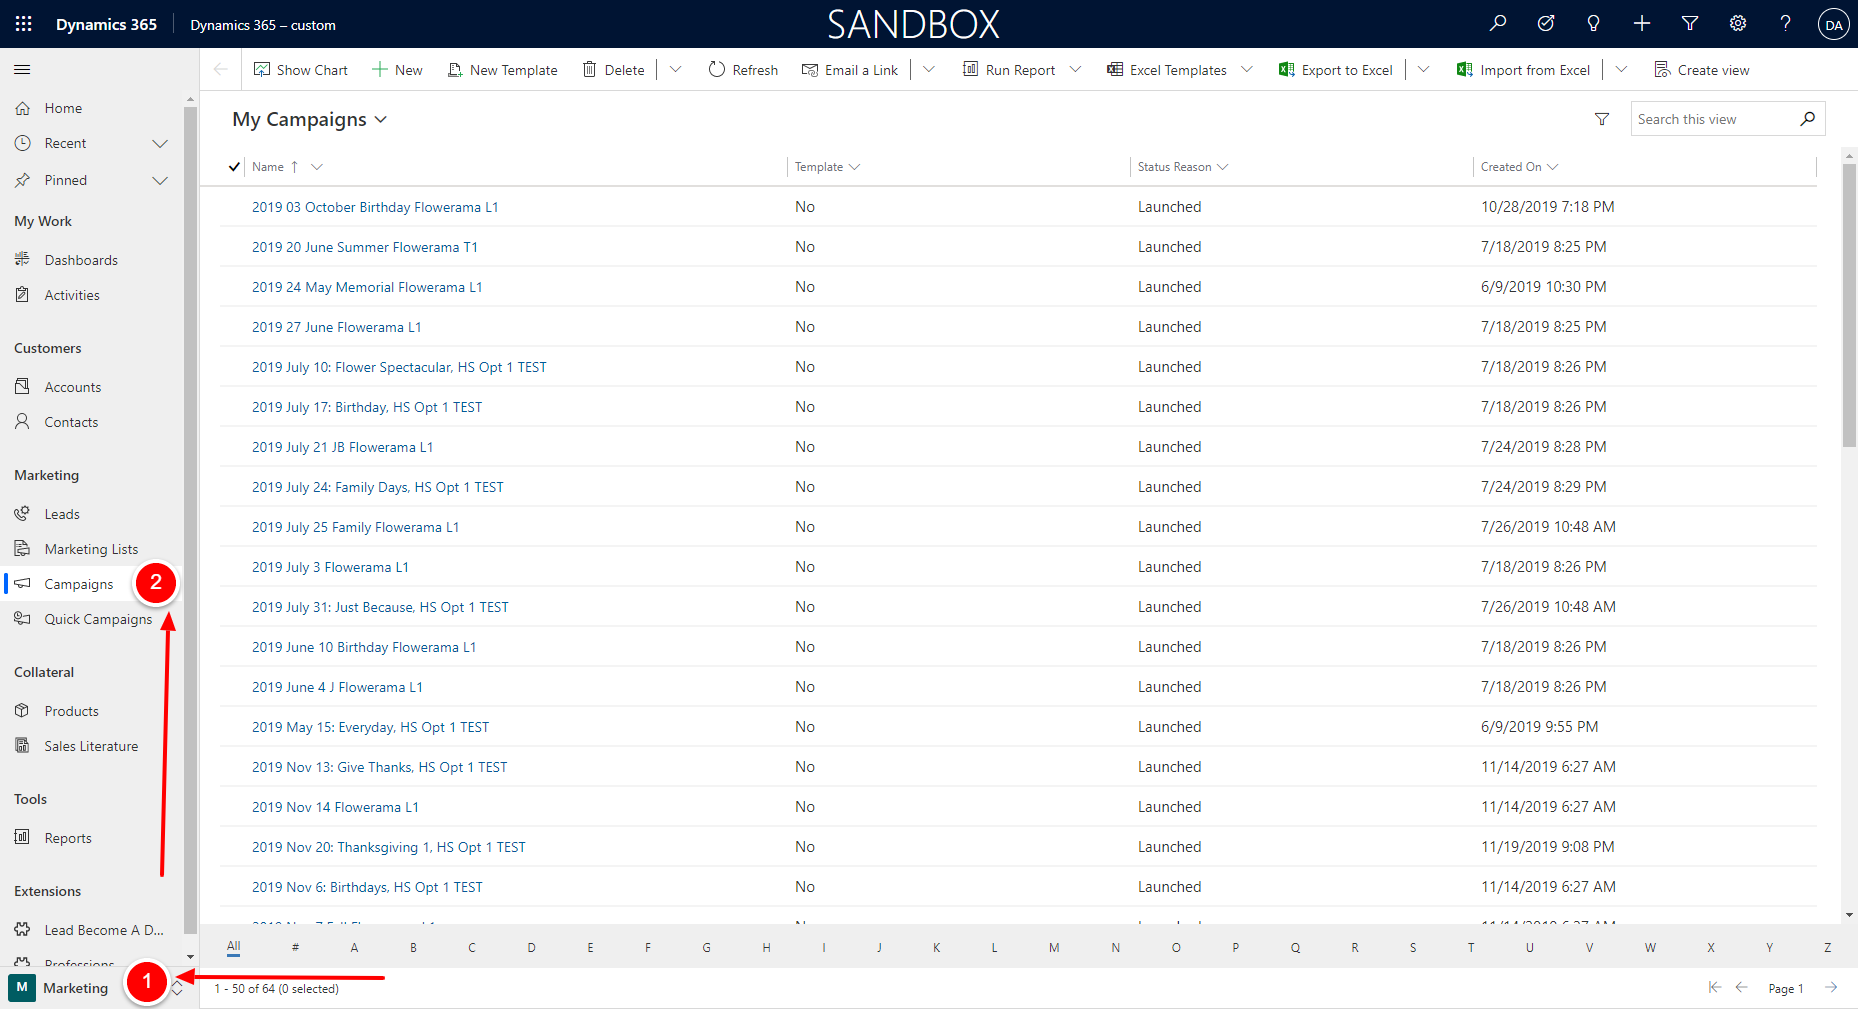
8.) Sync is completed now? Good! Head over to your CRM now and tap the "Change Area" button to Marketing > Campaigns. That sent Constant Contact Campaign will now be created as Dynamics 365 Campaign together with the Campaign Responses.
Need some help?
Check out the options below on how you can contact our support team and find the answers you need to help you with your SyncApps integrations.
Help Center & Email is 24/7 to support@cazoomi.com | Live Chat & Phone is scheduled
FAQs
Check out these Help Desk articles for answers to frequently asked questions.
Comments