
First of all, we’d like to thank you for dropping by and for your interest in SyncApps, the #1 integration platform for any Industry.
See how it works in the video below, no marketing just insights from our founder who has spent 25+ years building integrations :
Before getting started, let’s ensure all the basic information about SyncApps is covered and how the platform works with the software integration(s) your organization is trying to connect today.
About the Company
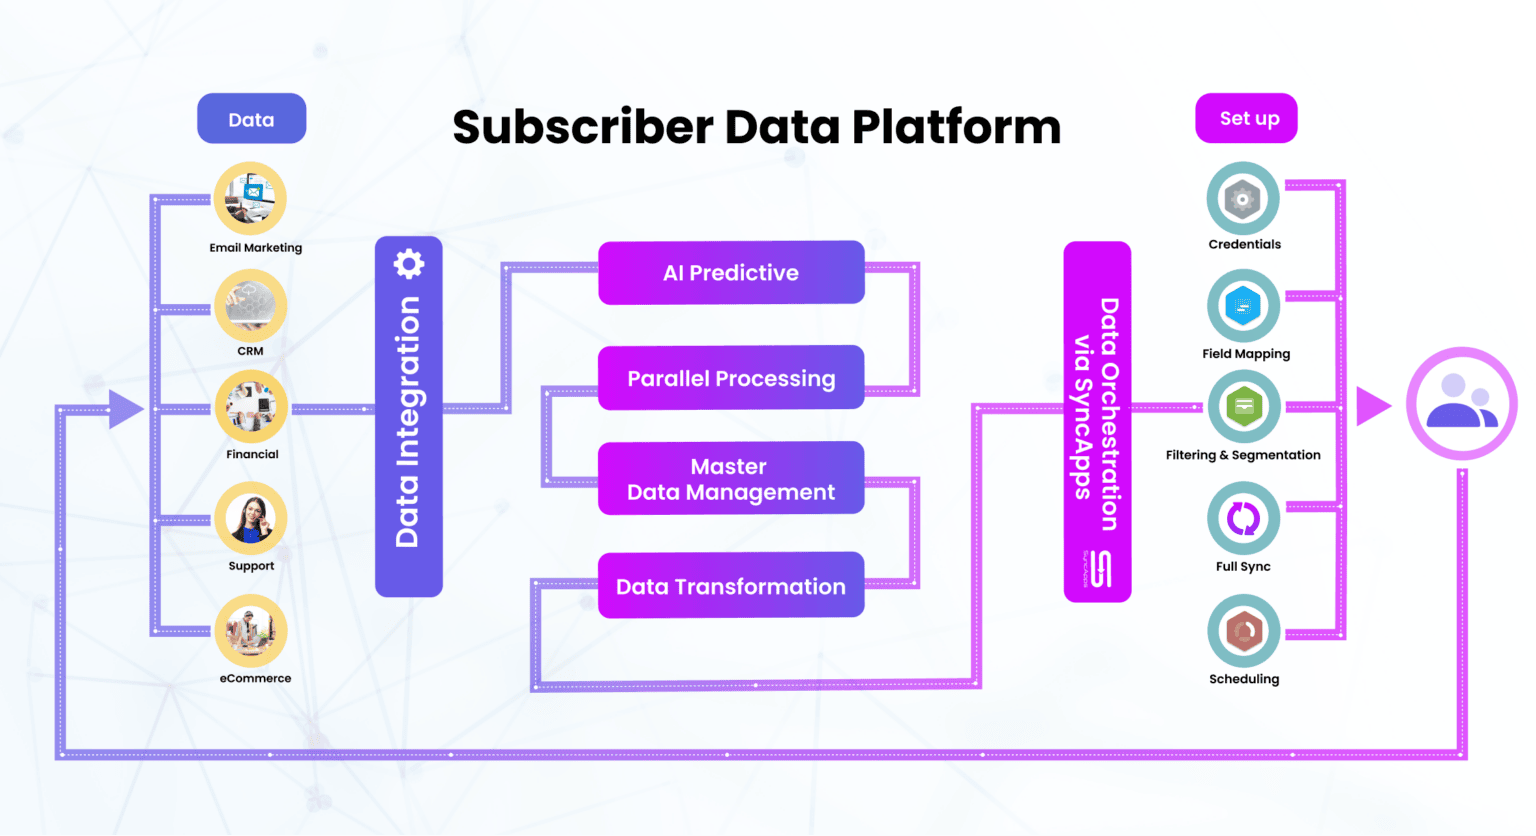
Over the past 15+ years, we've learned that you can always discover something new about your critical data daily. With our SyncApps® integration platform, you can integrate the best CRM, eCommerce, Marketing Automation, Financial, and Support software around the globe.
Want to see how we integrate our entire company workflow? Read our blog write-up here.
Our 24/7 Support can guide you through your various use cases and integration scenarios and set up as you explore your options on our platform, which has 250+ prebuilt workflows to help you integrate your data.
Want to know more about the Company’s history and success? Check it out here.
The basic function of SyncApps is to integrate your data bidirectionally, or even unidirectionally, based on your requirements. In other words, it enables your key software to talk and send information with other software in a two-way or one-way process. Using SyncApps, they can send, receive, and store information with each other.
For pricing, check here.
If you have more questions about our pricing, you can always reach out to our 24/7 Support Team.
Let’s Get Started!
Setting up your automation
Building your own integration is super simple! First, you’ll need to have a SyncApps account. Don’t have one? Sign up here.
After successfully signing up, check your inbox or spam folder for the account activation link. If you haven’t received it, contact our 24/7 Support Team so that they can manually activate your account.
Next, let’s explore the left panel tabs before creating a Set Up.
Dashboard
This tab will show you the following general information:
- Updated records of the current month
- Error records of the current month
- Processed records of the current month
- Average syncing time
- Plan details (subscription status)
- Usage
- Overview
You may also see the “Create a New Set Up” button if you haven’t set up your Set Up yet. This will lead you to the Set Ups tab, where you can create a new Set Up.
Set Up Automation
This tab is where you’ll create your integration or Set Up. You can create your integration by tapping the “Create a New Set Up” button. If you have created several integrations, you can also see your existing integration or Set Up on this part of the account.
A “Pause” button will stop your integration(s) from running automatically.
Reports
This tab will show you the visual reports from your integrations. You can also see the date-specific integration reports by scrolling down and the records that are shown at least for the last 10 running integrations (Cached).
Settings
This part of the SyncApps account is where you can select the Timezone for your organization and other options such as email notifications of your integration or Set Up's statuses of its syncs.
You may also set the Timezone here as your basis for data time syncing. Please note that when you enable the Sync Scheduling of your integration or Set Up, the Time Zone you have set becomes the basis.
My Account
This tab offers account management options for your SyncApps account:
- Edit Account
- Upgrade Plan, Update Billing Information
- Add new Team Member(s)
- Invoices
- Update Password
- Cancel Subscription, Delete SyncApps account
Are you using other payment methods aside from using a credit card? We also accept ACH/wire billing. If you have other payment methods or other invoice concerns, send a note to our Billing Team today!
Finally, we’re done creating your SyncApps Account. Now, let’s start setting up your integration or Set Up! Ready?
You are now setting up the integration, so enjoy 4 Full Weeks to test out all your use cases using all our features and integration capabilities.
- Sync 1 - 1,000,000+ records, such as Contacts, Leads, and Accounts sync, between software
- Sync 1 - 1,000,000+ Opt-Out sync from your Marketing Automation solution to CRM records
- Sync 1 or 1,000,000+ Campaigns/Tearsheets/Marketing Lists/Tags/List Views/Saved Searches
- Sync 1 - 1,000,000+ Campaigns from your Marketing Automation solution of choice
- Sync on Demand is included for easy testing of your integration scenarios
- Scheduling of a Set Up is available on Free Trial, and the One Plan
Pre-Steps
Once you’ve tapped the Set Ups tab, tap the Create a New Integration or Set Up button.
Enter any designated name for your new Set Up as your identifier. Then, in Sync Type, select the integration you need.
Step 1:
Enter your CRM, eCommerce, Support, Financials, or Accounting credentials here where you want your records and data synced from/to your connecting software.
For other integrations, you need to tap “Connect,” and you will be directed to the oAuth page that’ll log in to your software.
There are additional options available. Just tap the More Options section.
Have integration requirements other than basic syncing? Talk to us today!
Step 2:
Tapping the “Connect” button will lead to the oAuth page that’ll log in to your software. For some, you’ll need to enter your Software 2 credentials here.
After this, enter the name of your Main List (Or now called "Audience" in Mailchimp). What is the Main List, and why do we need to define it in Step 2?
During the sync process, a new list with the specified name will be created in Software 2. Yet, you can still use the names of your existing lists in Software 2. Note that if you name the Main List the same name as an existing Software 2 List, make sure to match the spelling 100% so as not to create a new list in Software 2 but to match it to the existing one.
When adding new subscribers to any Software 2 List, please note that only those in your "Main List" will be synced, or you can select the following option: Sync all active Contacts, not just those in the specified Software 2 List, to sync the specific Software 2 subscribers to your CRM.
Note: SyncApps requires a Main List or Audience to create, update, and remove records using the API.
For more options, tap the More Options section.
Full Sync
The Full Sync is applicable to CRM and eCommerce platforms and can be used in our trials and plans. The CRM must have List integration to be able to use Full Sync.
Read more about how the Full Sync Feature can automate your contact management today in our article here.
The Full Sync can be scheduled manually, daily, or weekly.
It allows you to keep your systems trued up with ease.
Step 3: Field Mapping
Field Mapping is optional. Basic fields such as Email Address, Name, Title, Address, Company/Account Name, Phone, and Email Opt Out fields are already pre-mapped even if you haven’t enabled this Step. Otherwise, if you have more additional fields to map, then you’ll have to set these fields up here.
Step 4: Filtering and Segmentation
This step is one of the most powerful features ever used by most of our subscribers. For example, if you have thousands of records in Salesforce and only want to pull out the records with specific criteria, only these records will be synced.
See here for more information on how it works.
Filtering and Segmentation Guide
Step 5: Sync Scheduling
Finally, here's the very last step: Select the time when you'd like your data to sync automatically.
Tap the Finish button and then Sync Now.
As we say, set it and forget it. Let SyncApps do the rest for you.
Need some help?
Check out the options below for contacting our support team and finding the answers you need to help you with your SyncApps integrations.
Help Center & Email is 24/7 to support@cazoomi.com | Live Chat & Phone is scheduled
FAQs
Check out these Help Desk articles for answers to frequently asked questions.
Comments